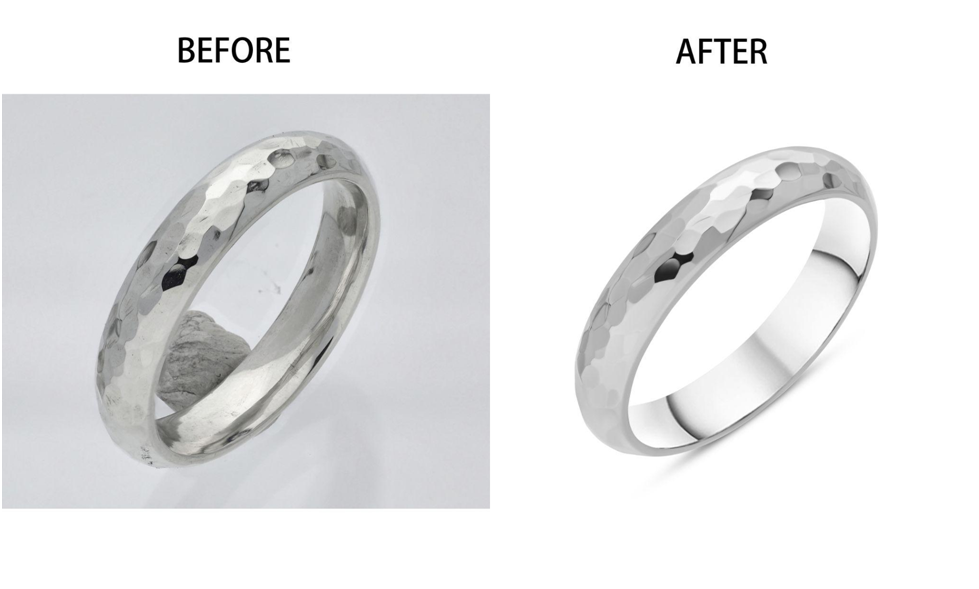
Background removal service for cosmetic product images
Photo Background Removal Services: The Top 5 Services Compared
Are you in need of a background removal service for your cosmetic product images? If so, you're not alone. Many businesses require this type of service in order to create high-quality product images.
There are a number of different background removal services available, and it can be tricky to know which one to choose. To help you make the best decision for your business, we've compared the top 5 background removal services.
Here's a quick overview of each service:
- Remove.bg
Remove.bg is a quick and easy background removal service that offers high-quality results. You can upload your image and have the background removed in just a few seconds. The service is free to use for basic images, or you can pay a small fee for more complex images.
- Clipping Path India
Clipping Path India is a professional background removal service that offers a range of services to suit your needs. You can choose from a range of options, including layer masking, color correction, and more. Prices start at just $0.39 per image.
- Background Burner
Background Burner is a simple online tool that allows you to quickly remove the background from your images. Just upload your image and select the area you want to keep. The background will be automatically removed.
Clipping path service for Amazon sellers
Best clipping path service provider
Affordable clipping path service
Professional clipping path service
High-quality clipping path service
Clipping path service with transparent background
- Fotor
Fotor is a simple online photo editor that also offers a background removal tool. Just upload your image and select the background removal option. You can then choose from a range of different backgrounds, or upload your own.
- Photoshop
If you're looking for the most professional results, then Photoshop is the best option. However, it is also the most complex and expensive option. Photoshop offers a range of different tools for background removal, so you can get the perfect result for your image.
So, which background removal service should you choose? It really depends on your needs and budget. If you need a quick and easy solution, then Remove.bg or Background Burner may be the best option. If you're looking for more professional results, then Clipping Path India or Photoshop would be a better choice.
- How to Remove Background in Photoshop: A Step-By-Step Guide
Are you a product photographer? If so, then you know how important it is to have a great product shot. And one of the most important aspects of a great product shot is the background.
In this article, we're going to show you how to remove the background from an image in Photoshop. We'll be using the "Layer Mask" tool to do this, and we'll be doing it in a way that is non-destructive to the original image.
Here's the image we'll be working with:
And here's the final image we'll be creating:
Let's get started!
Step 1: Duplicate The Background Layer
The first thing we need to do is duplicate the background layer. To do this, simply click on the "Background" layer in the "Layers" panel and drag it to the "Create a New Layer" icon at the bottom of the panel.
Step 2: Select The "Layer Mask" Tool
Next, select the "Layer Mask" tool from the "Tools" panel.
Step 3: Paint Over The Background
Now, simply paint over the background with a black brush. As you do this, you'll see the background start to disappear.
Step 4: Fine Tune The Mask
If you need to, you can use a white brush to "paint back in" any areas of the background that you want to keep. And if you make a mistake, you can always use a black brush to fix it.
And that's all there is to it! Removing the background from an image in Photoshop is a quick and easy process when you use the "Layer Mask" tool.
- Product Background Removal Services: The Top 3 Services Compared
When it comes to product photography, the background can be just as important as the product itself. A clean, simple background can make your product stand out and look more professional. But what do you do if you don't have a studio or professional photographer?
There are now several online product background removal services that can do the job for you. We've compared the top three to help you decide which one is right for you.
- Remove.bg
Remove.bg is a quick and easy way to remove the background from your product photos. Simply upload your image and let the service do its job. In just a few seconds, the background will be automatically removed.
The quality of the results varies depending on the image, but in general, Remove.bg does a good job. The main downside is that the free version is limited to images that are 500px x 500px or smaller. If you need to remove the background from larger images, you'll need to sign up for a paid subscription.
- Clipping Magic
Clipping Magic is another online background removal service. It's a bit more expensive than Remove.bg, but it offers a few features that Remove.bg doesn't.
With Clipping Magic, you can manually select the areas of the image that you want to keep or remove. This can be helpful if the automatic background removal doesn't give you the results you want. Clipping Magic also offers a layer tool, which lets you make changes to the image without affecting the background.
- Fotor
Fotor is a all-in-one photo editing tool that offers a background remover as one of its many features. The background removal tool is similar to the ones offered by Remove.bg and Clipping Magic. Simply upload your image and let the tool do its job.
Fotor also offers a wide range of other photo editing features, including filters, frames, and collages. If you're looking for an all-in-one photo editor, Fotor is a good option.
Which service should you choose?
If you need to remove the background from a small image, Remove.bg
- Transparent Background: How to Create a Perfectly Transparent Background in Photoshop
If you're a product photographer, then you know that one of the most important skills you can have is being able to create a perfectly transparent background in Photoshop. This is especially true if you're shooting for a cosmetics company, as many of their products need to be photographed on a completely white background.
There are a few different ways to create a transparent background, but the most common and effective method is to use the "Clipping Mask" tool in Photoshop. This tool allows you to create a mask that will only affect the layer that you have selected, and will leave the background layer untouched.
Here's a quick tutorial on how to use the Clipping Mask tool to create a perfectly transparent background:
- Open your image in Photoshop and create a new layer.
- Select the layer that you want to make transparent and click the "Clipping Mask" button in the layer panel.
- Select the paintbrush tool and make sure that your foreground color is set to black.
- Paint over the areas of the image that you want to make transparent.
- Save your image as a PNG file and you're done!
The Clipping Mask tool is a great way to create a perfectly transparent background, but it's important to remember that it will only work on the layer that you have selected. If you want to make multiple layers transparent, you'll need to create a separate mask for each layer.
- How to Remove Background from Image: A Quick & Easy Guide
Are you tired of having to edit your images to remove the background? Well, there is an easy way to do it with the help of the right tools. In this quick and easy guide, we will show you how to remove the background from your images with just a few clicks.
First, you will need to open the image in your editing software. For this guide, we will be using Adobe Photoshop. Once the image is open, go to the “Select” menu and click on “Select Subject”.
This will automatically select the subject of your image and remove the background. If the background is not completely removed, you can use the eraser tool to remove any remaining background.
Once the background is removed, you can save the image as a PNG file. This will preserve the transparent background. You can now use the image with a new background or overlay it on top of another image.
And that’s it! You have now successfully removed the background from your image.
Free Trial | Edit 2 Images Without Any Charge | Clipping Way
Contact Us For Any Image Editing Queries | 24/7 Available
Get Quote | Receive Estimated Price For Image Editing
Clipping Way | Laurel MD | Facebook
Clipping Way (@clippingway) / Twitter
https://www.linkedin.com/company/clipping-way
Clipping Way (clippingway) - Profile | Pinterest
15640 Millbrook lane,
Laurel, MD 20707
+1(409) 231 0231
Via Portunno no- 97,
Inter no- 3, 00054 Fiumicino RM
Skype: clippingway
92 Eastern Avenue,
Sheffield S2 2GJ
+44 744 144 6777
Opmerking
Welkom bij
Beter HBO
© 2025 Gemaakt door Beter HBO.
Verzorgd door
![]()
Je moet lid zijn van Beter HBO om reacties te kunnen toevoegen!
Wordt lid van Beter HBO