5 Things Everyone Gets Wrong About Ebay Product Photography
Exactly how to Produce a Image Perfect Ecommerce Internet Site With Product Photography
The human brain can refine photos in only 13 milliseconds-- which implies you click now don't have much time to make a excellent impression on your customers.
What shoppers see is commonly a deciding factor in whether they will certainly remain on your site or lose interest, so it's crucial that you purchase building an on the internet shop that catches their eye and keeps them interested.
One of the very best means to do this is through excellent product photography.
If you're running an ecommerce company, you possibly currently understand exactly how fantastic your products are, yet until a consumer has your product in-hand, all they have to depend on are the pictures on your web site.
This is why the most effective ecommerce websites not just have great items, yet also fantastic pictures of their items. These pictures testify to the top quality and worth of your items and establish transparency into your ecommerce service.
In this article, we'll give you the full review on all things product photography to make sure that you can be on your way to getting that perfect shot.
Types of Product Photography

Product photography isn't one dimension fits all. Just as your ecommerce store likely features a selection of products and services, product images also can be found in a range of designs and functions. Some are for daily usage, while others are much more distinct and only made use of in special cases.
Whether you wish to maintain a constant appearance throughout your product pictures or tastefully mix as well as match them, it is necessary to understand the difference between each kind of product photography and exactly how to best capture them.
Below we have actually assembled a checklist of the six most usual types of product shots, when to use them as well as what they resemble in practice:
1. Specific shots.
Among the most common sorts of product photos, the individual shot consists of only one object in the frame. These are typically featured in product catalogs, banner pictures as well as throughout product pages to display individual items individually from the full collection.
A excellent instance is this from Skullcandy, which is shot with a white history to create a clean, basic look and keep the focus on the product.
2. Team shots.
You presumed it-- team shots showcase greater than one product together.
Often used for product packages as well as collections, team photography presents the variety as well as selection of your products and also provides the customer a extra full sight of your offering. These kinds of images are best for social media sites blog posts and also promotions, as they offer consumers a preference of your brand all at once, instead of just one product.
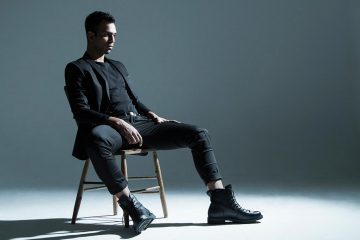
3. Way of living shots.
This sort of photography is where you reach reveal your products in action.
Often taken with a version, like this instance from Peter Christian, way of living shots tell the story behind your product and reveal your clients just how they can use them in their daily lives.
While way of living pictures can match specific shots on your product web page, they're likewise perfect for social networks, e-mails, ads and also various other visual networks, due to the fact that they catch the eye and also make your products really feel much more personal.
4. Range shots.
A usual concern with purchasing online is not being able to evaluate the real dimension of a product. While product descriptions might detail the measurements of an product, product pictures can be deceiving.
However with scale shots, you can aid your customers get a better idea of the actual size of a product by contrasting it with various other daily products, comparable to this instance by Ivory. This will aid your clients visualize your items in their daily lives and also boost their self-confidence when buying online.
5. In-depth shots.
For items with little details that call for a close-up, consisting of jewelry as well as various other tiny items, in-depth shots help highlight particular product functions that a conventional photo may not catch.
This type of photography usually requires details light as well as video camera setups, such as a macro lens, to record those fragile shots.
6. Product packaging shots.
Think it or otherwise, customers care about packaging.
From searching your site to buying and also getting their product in the mail, consumers seek a shopping experience that is consistent throughout. So, even though you may have an fantastic product, if your discussion isn't up to par, your clients may make note.
And also if your products come with gorgeous, well-known packaging, why not feature it on your product page to offer your consumers a preference of what to anticipate?
Packaging shots, such as this example from Eco-friendly Roadways, attribute not just the product itself, however also the product packaging, whether it be a box, bag or label.
Product Photography Tips and Refine
Of course, for those of us who don't know the difference between a Nikon or a Kodak, product photography can seem a little intimidating. And also for small companies on a spending plan, investing in expensive photography devices just isn't an choice.
Luckily, taking premium photos is much more available today than it was ten years earlier. Taking into consideration most of us currently have a 12-megapixel iPhone cam in our pockets, and also several top-tier editing and enhancing software is ending up being much more budget friendly, boosting your ecommerce photography is probably easier than you believe.
Right here we have actually highlighted some ideas as well as practical steps for developing your very own DIY, at-home photography studio.
1. Set up your background.
Getting the appropriate background not just keeps the focus on the product you're photographing, but it additionally assists streamline the modifying process when it comes time for post-production. Try utilizing a white or light background, as this will certainly make it less complicated to get rid of undesirable items and also retouch pictures.
The good news is, you do not need to spend an arm and a leg on a expensive background to obtain the ideal shot. There are a couple budget-friendly choices that will certainly get the job done:

Shooting table
If you're going to have a number of photoshoots, you may wish to get a white sweep off of Amazon.com. However if you want to go the homemade path, you can make your own chair-mounted sweep making use of a roll of white craft paper.
All you need to do is press the rear of the chair versus a wall surface as well as tape the craft paper on the wall surface over the chair, allowing it to fall to the ground. This will produce a tidy transition between the upright and also straight airplanes whenever you position your product on the chair.
Or, another choice is to clamp the sweep to the top of the chair and enable the paper to drape down the chair, which will certainly create the exact same seamless effect.
Nevertheless, for bigger items such as furnishings, you'll need to buy a stand-mounted move like the one below. Or, you can make use of the exact same approach as the chair-mounted sweep by taping white craft paper to the wall.
Light outdoor tents
Another affordable choice for a background is to develop your very own light outdoor tents, otherwise called a lightbox. This is a wireframe box with clear walls which helps produce an uniformly distributed light around the object in focus.
To make your very own, you'll require a plastic storage space container, placed on its side with the lid off.
Next off, cover the bottom-- and all the opposites, if you're wanting a extra equally distributed light-- with white paper.
Lastly, position an man-made light on either side of the container, or simply make use of natural light from a close-by window if you're working with a budget plan.
2. Set up your product.
Now it's time to bring your product into the spotlight.
It may appear basic, but setting up your product can take a few shots to obtain the angle, lights and setting perfect.
Put your product in front of the background, making sure that it's centered as well as on a flat, steady surface like a table or chair.
For points like fashion jewelry and various other accessories, you may want to use a bust that much better shows the product, and also for items with tags or special layouts, you may need to spend a long time adjusting the product till it's exactly focused.
For smaller, much more detailed products, below are a few even more tools that could be handy:
• Glue dots as well as tape for keeping little products in position, such as earrings or lockets.
• Mannequins for apparel and also devices.
• Wall mounts or appealing flatlay for showing items at different angles.
• A friend or employee for modeling clothes or developing fun way of living shots.
3. Adjust your lights.
One of the most vital elements in recording a quality product photo is having best lights. Although it may bore to change, creating good illumination makes all the difference in an image, as well as you'll most definitely thank on your own later during the post-production process when you have less edits to make.
The good news is for product photography, you only have two sorts of source of lights to select
Opmerking
Welkom bij
Beter HBO
© 2024 Gemaakt door Beter HBO.
Verzorgd door
![]()
Je moet lid zijn van Beter HBO om reacties te kunnen toevoegen!
Wordt lid van Beter HBO